Instant ESXi installation
Fast, easy, headless …
 |
Read here, how to setup your ESXi 6 server on N3150/J3160 systems over the internet in only a few minutes!
Some month ago I wrote the Article “VMware ESXi 6.0 / N3150 / J3160” here in my blog. I found out a trick for a headless install, because the ESXi installer doesn’t work with the SOC-graphics on these systems and seams to hangs after echoing out the message “relocating modules”. I got a lot of feedback concerning this topic from around the world from blog readers that were happy to get it up and running.So far, so good, but it was difficult to customize and many steps had to be done (keyword “double virtualization”). So I looked for an alternative and here is a much easier, faster way to install ESXi headless for N3150/J3160 and this solution is also working on some other systems as well. |
		Update available for a J1900 system with quad ethernet LAN. Read: here
Thanks to Johan
What is IPXE?
IPXE is an open source network boot firmware from http://www.ipxe.org. It provides a full PXE implementation enhanced with additional features such as boot and install from a web server via HTTP and many other IP communication features and embedded script support – well-suited for my project.
The instant setup
I took my custom ESXi ISO (see other article), expanded the content to a directory on my public webserver and made some install scripts and config files. This is a supported way by VWware ESXi installer. The main trick behind this alternative is the use of IPXE.
With IPXE it is easy to install an ESXI system with my custom ISO image over the internet to a headless system and this can be done with low interaction in only a few minutes.
I built an IPXE script which presents a boot menu to configure the network interface inside your destination system via DHCP, than connects to my webserver and starts the installation. The ESXi files will be loaded, the internal hard disk can be wiped or existing vmfs partitions can be saved. If no useable harddisk is found, the installation uses the boot USB stick instead.
The system will be prepared and installed automatically quite fast – depending on the speed of your internet connection.
Step by step
1 What do you need to have?
- Internet connection – the faster, the better 🙂
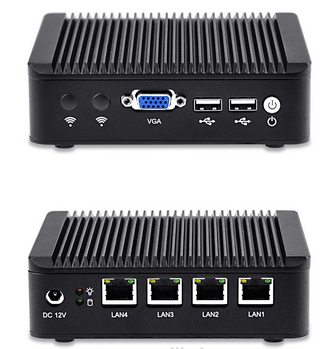
- A VMware ESXi capable destination system attached to LAN,,
with hardware supported by my custom installation ISO,
eg. N3150/J3160, > 4GB RAM - A build in harddisk or SSD for ESXi and/or vmfs filesystem (VMs and data),
that can be overwritten by installation! - Empty, unused USB stick (> 4 GB if used to install ESXi on this USB stick)
- DHCP for automatic IP V4 adress supply during installation
2 What do you need to do?
2.1 Make boot media
Download my IPXE USB boot file from here and write it to an empty, unused USB stick
(it will be overwritten and existing data will be erased!)
Write image to stickWindows: Linux: |
2.2 Just boot it 🙂
Boot your destination system from this stick
- During system cold start, press the BIOS key for boot menu (eg. F9) and choose the stick or setup BIOS to do it
- On some systems “secure boot” has to be disabled temporally or the use of “legacy boot instead of UEFI is necessary
My IPXE menu will be shown. Read the warnung about losing data and double check that your destination doesn’t include important data.
The installation erases data on the target system, so use it at your own risk and responsibility!1.
2.3 Configure DHCP and start installation
If you want to continue, let DHCP configure your system (IP, mask, …) to get a working internet connection.
Choose “wipe” install, which erases all partitions on the first disk found or use the other option” to preserve your vmfs data partitions.
Important notes about unattended instant setup:In both dcases other operating systems, other partitions and existing ESXi installations on the first disk found will be overwritten! Write down your shown configuration URL for later use: http://<ip-address>/ui/My custom ISO file is newer than the one I used in my previous post and it includes the VMware ESXi embedded host client, which enables management via browser. Warning: Due to the headless, scripted installation, it is not possible to choose a certain harddisk, so the first found disk will be used! Please note that the installer ISO needs to have a driver for the disk. If no suitable disk will be found, the installation will erase your USB boot stick and installs ESXi on it. This will only work with USB sticks > 4 GB. |
2.4 Wait
After starting the installation, wait until it has been finished. It will take some minutes to download all modules from my webserver and to install the system.
N3150/J3160 systems will show console output until the famous message “relocating modules” – but installation will continue in the background.
I would just clarify that once “relocating modules” is displayed the first time, install continues in the background indeed, but the /ui/ URL is unreachable, then the system reboots and “relocating modules” is displayed a second time and the /ui/ URL is OK.
On systems with a DVD/Blueray drive, the drive will be ejected at the end of the installation as a sign for installation completion. After some additional seconds, the system is rebooting automatically and can be accessed via the Management URL http://<ip-adress>/ui/ and via SSH (putty).
Read my previous post, how to get the local ESXi console via SSH.
2.5 Some postinstallation customizing
Now it is almost done. Login to your new ESXi with default ‘root/password‘ and change these credentials to your own secure password.
Than configure your final management network and apply a permanent VMware licence for your ESXi.
You have now a working ESXi system and in the next step you can setup VMs, install a backup solution like the free Ghetto VCB script, etc, etc, etc …
For users who want to make their own ESXi network installation
You do not trust software installation over the internet or you are a “do it yourself guy” and want to make your own custom ESXi ISO and network installation?
OK, I’m not really sulky, here are the instructions 😀
Again my warning, use all my scripts at your own risk, as data can be overwritten!
1. Custom ISO file
First of all create your custom ISO file for ESXi installation as described in my previous post or download mine from the above link box:
Than use a linux system to expand the ISO to a webserver directory. As user ‘root’ mount it with the following command and copy out the files:
mount -o loop /path_to_ISO-image/image.iso /mnt/disk
I prefer to use linix for this step as some Windows systems mount ISO with highest compatibility and all file names will be uppercase (not so good)
2. Installation scripts and config answer files
Download my installation scripts and configs from here, modify them to suit your needs and copy them to your webserver.
For “selfmakers” – the boot-xyz.cfg files were originally taken from the original ISO and slashes (‘/’) had to be removed from module names and path lines.
Better use a separate config directory on your webserver to avoid confusion with the ISO files and use an editor like notepad++ for modifications.
3. IPXE boot
As usually BIOS do not supply IPXE, you have to create an IPXE boot media, e.g. a boot USB stick.
Instructions can be found here: http://www.ipxe.org/
Online IPXE boot media creation:As an easier alternative to building IPXE manually, the image can be created online on this web portal: https://rom-o-matic.eu/ Choose ‘Advanced, for experienced users’ and ‘usb keychain image’ for an USB boot stick Include all drivers for network interfaces, at least the driver for your NIC. Klick on ‘IMAGE_COMBOOT, SYSLINUX COMBOOT image support’ for a working boot media. Paste in my IPXE boot script from the download link in this post. Click ‘Proceed’ at the end of the page, download your custom boot image, burn it to DVD or write it to USB, boot from it and … have success. |
Don’t forget to mention me and setup a link to my blog, if you want to propagate this solution.
Antonio
Download files link boxMy first custom VMware ESXi ISO file: 2018/02/03 – Updated ESXi 6.5 ISO file (unzip it after download): boot.cfg with harddisk wipe: boot-wipe.cfg boot.cfg without harddisk wipe: boot-nowipe.cfg USB boot image: ipxe-ESXi-install.usb.img IPXE boot script: IPXE-script-v3.txt |
IPXE boot script v3 with DHCP and menu support
#!ipxe
echo
echo ******************************************************************************
echo * IPXE-Script V3 / Auto install ESXi over Internet, Antonio Jorba, 2016
echo * !! No warranty, use this installer at your own risk and with caution !!
echo * Remember that the DATA on the first disk may be OVERWRITTEN without warning!
echo * So use this script with caution, you may lose data otherwise!
echo ******************************************************************************
echo
echo Press a key to continue when you have read the above warning,
prompt otherwise power off your system now!
###################### MAIN MENU ####################################
# Menu defaults
set menu-timeout 10000
isset ${menu-default} || set menu-default DHCP
:start
menu Install VMware ESXi 6 over IPXE (internet source), Antonio Jorba, 2016
item --gap --&nbsp;&nbsp;&nbsp;&nbsp;&nbsp;&nbsp;&nbsp;&nbsp;&nbsp;&nbsp;&nbsp;&nbsp; ------------------------- Installation options ------------------------------
item --key d dhcp&nbsp;&nbsp; &nbsp;&nbsp; Auto-configure Interface via DHCP (autom. after 10 sec)
item --key n network&nbsp;&nbsp;&nbsp;&nbsp;&nbsp; Show network settings
item
item --key w wipe&nbsp;&nbsp;&nbsp;&nbsp;&nbsp;&nbsp;&nbsp;&nbsp; Wipe complete first disk&nbsp;&nbsp; / Install ESXi
item --key k keepvms&nbsp;&nbsp;&nbsp;&nbsp;&nbsp; Keep existing VMFS volumes / Install ESXi
item
item shell&nbsp;&nbsp;&nbsp;&nbsp;&nbsp;&nbsp;&nbsp;&nbsp;&nbsp;&nbsp;&nbsp;&nbsp;&nbsp;&nbsp;&nbsp; Drop to iPXE shell
item reboot&nbsp;&nbsp;&nbsp;&nbsp;&nbsp;&nbsp;&nbsp;&nbsp;&nbsp;&nbsp;&nbsp;&nbsp;&nbsp;&nbsp; Reboot computer
item
item --key x exit&nbsp;&nbsp;&nbsp;&nbsp;&nbsp;&nbsp;&nbsp;&nbsp; Exit iPXE and continue BIOS boot
choose --timeout ${menu-timeout} --default ${menu-default} selected || goto cancel
set menu-timeout 0
goto ${selected}
:cancel
echo You cancelled the menu, dropping you to a shell
:shell
echo Type 'exit' to get back to the menu
shell
set menu-timeout 0
goto start
:reboot
reboot
:exit
exit
:failed
echo Booting failed, dropping to shell
goto shell
############ MAIN MENU ITEMS ############
:dhcp
set menu-timeout 0
echo configure interface with DHCP, please wait
ifconf --configurator dhcp net0
:network
echo
echo Interface settings:
isset ${net0/mac} &amp;&amp; echo MAC address: ${net0/mac} || echo No MAC address setting
isset ${net0/chip} &amp;&amp; echo Network chip: ${net0/chip} || echo No chip data found
isset ${net0/ip} &amp;&amp; echo IP address: ${net0/ip} || echo No IP address found
isset ${net0/netmask} &amp;&amp; echo Netmask: ${net0/netmask} || echo No netmask setting
isset ${net0/gateway} &amp;&amp; echo Gateway: ${net0/gateway} || echo No Gateway setting
isset ${net0/dns} &amp;&amp; echo DNS: ${net0/dns} || echo No DNS server setting
isset ${net0/domain} &amp;&amp; echo domain: ${net0/domain} || echo No domain setting
echo
prompt Press a key to continue with the menu
goto start
# Set kernel and config parameter to unpacked custom ISO on webserver
:wipe
echo *******************************************************************************
echo Installing ISO files and config from:
kernel http://esxi.jorba.de/ipxe/ESXi-6.0.0-20160804001/iso/mboot.c32 -c http://esxi.jorba.de/ipxe/ESXi-6.0.0-20160804001/config/boot-wipe.cfg
echo
echo This is a wipe install, that removes all partitions from first disk!
echo
prompt press a key to continue
goto instmsg
:keepvms
echo *******************************************************************************
echo Installing ISO files and config from:
kernel http://esxi.jorba.de/ipxe/ESXi-6.0.0-20160804001/iso/mboot.c32 -c http://esxi.jorba.de/ipxe/ESXi-6.0.0-20160804001/config/boot-nowipe.cfg
echo
echo This installation keeps existing VMS partitions,
echo but may delete other existing data on first disk!
echo
prompt press a key to continue
:instmsg
echo
echo Installation over http will take some time, depending on your connection!
echo After the installation, the system is automatically rebooting.
echo Don't forget to change the default 'root/password', configure your mgmt network
echo and provide a permanent license from VMware for a fully functional system.
echo Notice: On N3150/J3160 systems or similar, no output will be shown after the
echo message 'relocating modules', but installation will continue, so be patient!
echo
echo URL for embedded ESXi management host client after installation:
echo https://${net0/ip}/ui/
echo
echo Final warning:
prompt Press a key to install ESXi, otherwise power off your system now!
boot || goto failed
There was a little problem in “IPXE boot script v2”,code nu 24 and nu 76
Ok, I’ll look at these lines
Well, when copying the script, don’t forget the characters in larger lines – or just download the script with the link in the “Download files link box”.
If “wipe install” isn’t working, boot with a standalone gparted USB image and wipe the destination disk, than use “normal” install
In the boot script I’ve corrected a label mismatch in wipe_install and added some modifications to network settings output (DHCP), so the script is more fault tolerant, if there are some DHCP uninitialized parameters, e.g. domain settings.
Thanks to Matt and se7eneo for your feedback.
Now the Version 3 USB boot image and boot script V3 are uploaded
Thx for your great solution, been struggling with my qotom j1900 for a few days to get esxi working (relocating modules…). I can now boot my device to using USB, obtain an IP addres and it starts downloading files.
However it generates an error with the 12th file.
Error loading …/ISO/s.v00
Compressed MD5: 15……b1a
Decompressed md5: 00…..000 (all zeroes)
Fatal error: 10 (out of resources)
Currently proxmox is installed on this system, should I wipe it first? Or is something wrong on your server side?
Any hints would be very much appreciated.
Hi Johan,
another idea, if you tried the things described here without success.
I think you made an boot USB stick and you are using my webserver installation method as described here?
I had one single problem in the past with a system that had a mSATA drive (not a “bigger” SATA SSD).
There was no driver for that disk and in that situation my unattended setup script would use the boot stick as installation media.
In that case the stick has to be bigger than 4 GB (>= 8 GB).
So perhaps try to use another USB stick 😀
I hope one of these ideas would work and you’ll get your “unsupported” system up and running 😀
Antonio
I’m having the same issue as Johan – fatal error out of resources at the same point.
Any chance this can be fixed?
Server site is OK and working.
If you use my “express installation method” no ISO file is needed, lYou’ll need to boot from an USB stick, prepared as described there in the post. The installation will fetch the unpacked ISO files from my webserver. I tested it last time on last Wednesday
I provided the ISO file for users, who want to make their own installation environment.
There are some other (little bit older) ESXi 6 ISO files on my server, which can be downloaded here:
http://www.jorba.de/esxi/esxi6-iso.zip
http://www.jorba.de/esxi/esxi6-v2-iso.zip
The first file was from my original post from January, without update 2 and it was used many times with success on N3150/J3160 and on some J1900.
The second image was created for a dual ethernet ZBox board.
Maybe my last ISO file isn’t working well or the U2 installer is bad – I’m awaiting your responses.
I wish you success.
Antonio
Well, the error is “out of resources”, so first of all check that you have enough RAM. Du you have more than 4 GB usable RAM space?
Sometimes the ESXi installer reports “wrong” error conditions, e.g. with too less RAM it prints out “no network card” under some circumstances 😉
So I searched some ESXi forums and there I’ve read about some more issues concerning this type of error:
An user posted the same error with his nvidia graphics: https://elgwhoppo.com/2015/02/09/installing-esxi-6-0-with-nvidia-card-gives-fatal-error-10-out-of-resources/
Another user with “out of resources message” had some trouble to install ESXi with incompatible hardware, read here: https://obviate.io/2015/08/26/esxi-6-0-has-a-fickle-installer/
And here is a report about this message with ESXi 5.5: https://communities.vmware.com/thread/479249
So what can you do, if the error persists?
–> Check RAM size
–> Check your graphics adapter (I do not have NVIDIA)
As a “last” chance, install the ESXi on another computer on USB stick and boot your system from this “foreign prepared” stick. It is also possible to make this stick under VMWare Player, as described in my first ESXi post here: https://mobiletiger.jorba.de/vmware-esxi-6-0-n3150-itx-intel-celeron-braswell-platform-problem-solved/
Don’t forget that the “instant installation” will use the first disk found, so disconnect all harddisks/SSDs to install ESXi on the USB stick, you’ve booted from (>= 8GB).
There’s an issue using iPXE from you, when it comes to downloading s.00 from your site it times out with an errorous md5 checksum.
Hi Andy, the file is ok. Another user with same error had incompatible hardware. What a system do you use? Di you have a single LAN adapter?
Thank you for your solution but I get same error with the 12th file :
Error loading …/ISO/s.v00
Compressed MD5: 15……b1a
Decompressed md5: 00…..000 (all zeroes)
Fatal error: 10 (out of resources)
My hardware is a Gigabyte BRIX based on J1900 (with a single LAN adapter).
Well this is not a problem with that 12th file, the file isn’t corrupt.
The installation was made for N3150/J3160 systems, not for J1900.
But read another post here in my blog:
https://mobiletiger.jorba.de/install-vmware-esxi-5-5-6-successfully-on-qotom-j1900/
OK so let’s try the option 4 !
I thought about it because the option 4 doesn’t really fit to me (I would prefer ESXi installed on my SSD drive rather than on an external USB key…).
Actually, with the iPXE method I have an error loading s.v00 file. But when I boot on the *same* ESXi iso but with an usb key method, I pass successfully this file and then I’m stuck with “Relocating modules and starting up the kernel” regular message.
So I don’t think the problem is related to an hardware incompatibility but with the iPXE method itself.
Don’t you think Antonio ?
FYI I don’t have a mSATA, it’s a regular SATA hardware.
After all, I decided to try the option 4 but with my SSD instead of a USB key.
I connected the SSD of my BRIX to my PC (with an USB adapter) and successfully installed ESXi 6 !
My BRIX boot now with ESXi on my SSD, I did it 😉
Thanks for your help
Hi Antonio, congrats for this excellent post and technique. I installed ESXI without a hitch on my ASRock barebone PC. Clap clap!
I would just clarify that once “relocating modules” is displayed the first time, install continues in the background indeed, but the /ui/ URL is unreachable, then the system reboots and “relocating modules” is displayed a second time and the /ui/ URL is OK.
Good job!
Hi Jean-Baptiste,
I’m glad to hear, that the installation finished successful on your system. Thank you for your feedback and for your clarification, that the management URL is available after a reboot. I’ve added this note to the post.
Hello,
Thank you for this outstanding job!
Couple of questions:
1) Does your custom .iso contains the following VBI’s:
– Support for Realtek 8168/8111/8411/8118 based NICs: https://vibsdepot.v-front.de/wiki/index.php/Net55-r8168
– Support for unsupported SATA AHCI Controllers: https://vibsdepot.v-front.de/wiki/index.php/Sata-xahci
2) Would it be possible to upgrade to latest ESXi Release ? ESXi-6.0.0-20161104001-standard
3) Have you tried ESXi 6.5 with a N3150 PC?
Thanks,
Hi,
here are the answers:
1) This was the customizing command for creating the ISO:
–> .\ESXi-Customizer-PS-v2.4.ps1 -v60 -vft -load net55-r8168,net51-r8169,sata-xahci
–> So the Realtek Net55-r8168 and the sata-xahci drivers from v-front depot are included.
2) Would it possible to upgrade to latest ESXi Release
-> Not planed by me at the moment, but easy for you, as ESXi patches are cumulative, read here: http://www.vladan.fr/how-to-install-latest-esxi-vmware-patch/
3) Have you tried ESXi 6.5 with N3150 PC?
–> This is my next project, when I get an “empty” N3150 / J3160 from a friend. I heard from some problems with that, so I do not test it with my production system 😉
Antonio
Thanks a lot for the answers
Receiving this bad boy in a couple of weeks:
https://www.aliexpress.com/item/Big-Promotion-Fanless-desktop-computer-Intel-Celeron-N3150-Quad-Core-Celeron-N3050-Dual-Core-Dual-HDMI/32595134091.html?spm=2114.13010608.0.0.ezwziJ
Will test and let you know.
After running this script and first seeing the “relocating modules” message, it seems to still hang forever. How long should it take to reboot?
I am trying to install on a Jetway JBC323 http://www.mini-itx.com/~JBC323
Has anyone had success installing on this system?
Thanks.
Hi John B,
this instant setup was made for N3150/J3160 systems only (others may work).
Your system has different hardware (e.g. dual ethernet).
I’ve posted two other blog entries, that I recommend for your attention:
1. https://mobiletiger.jorba.de/install-vmware-esxi-5-5-6-successfully-on-qotom-j1900/
–> This is a quad ethernet board
2. https://mobiletiger.jorba.de/vmware-esxi-6-0-n3150-itx-intel-celeron-braswell-platform-problem-solved/
–> my initial post for headless ESXi installation
There are several ways to get ESXi up and running on systems that are not included at vmware HCL (hardware compatibility list), e.g. use a vmware player for setup, boot from USB, make a running installation on another computer and switch harddisk, use hardware serial console, use IPXE for internet installation, etc.
What I cannot figure out is what VIB files I need to load into my custom ISO to get it working?
How can I find out what storage controller and LAN drivers I need?
I checked what PID’s for the sata and the network adapter.
The 2x gigabit intel nics are 8086:1539 and the sata controller is 8086:22a3.
As far as I can tell, the sata-xahci package covers this sata controller PID and the net-igb package covers these nics.
Is there something special I have to do because there are two of them?
I have tried hosting my own esxi 6.5 image, made using the customiser. I used the following command:
\ESXi-Customizer-PS-v2.5.ps1 -v65 -vft -load sata-xahci,net-igb
Once I had this I expanded it to my local webserver, and customised the boot scripts to point there.
The IPXE bootup ticks along nicely, loading all the files, then hangs at the “Relocating Modules” message. I’ve left it for a long time and the system never reboots.
Is there anything I can do to diagnose this further?
Thanks.
Hi John B,
there are some tips left for diagnose this further:
–> First of all try the second ethernet port and look into your Router’s DHCP table, if there is activity.
Please read this post from Johan on my blog, who had similar problems: https://mobiletiger.jorba.de/install-vmware-esxi-5-5-6-successfully-on-qotom-j1900/
If this isn’t working, try the vmware Player installation – boot from USB Stick. See here: https://mobiletiger.jorba.de/vmware-esxi-6-0-n3150-itx-intel-celeron-braswell-platform-problem-solved/
Some users were able to prepare the ESXi system on another computer and finally switched the hard disk.
And “last not least” – please try your custom IPXE installation first on a system with a supported graphics card and than let it run on your final computer to avoid bugs in config or scripts.
I tried the VMWare player method, but I get the same result.
Once it gets to the “Relocating Modules” message, the system hangs. There is no activity in the DHCP and I cannot connect via the webbrowser. I think there is some serious incompatibility between the Jetway rig and ESXi 🙁
Hi John B,
… don’t give up.
Did you installed Windows on your jetway rig system and tried to double virtualize the ESXi installation with VMWare Player to make it booting from USB stick? Under vmware player the graphics card is virtualized and there is no freezing after the message “relocating modules”.
Antonio
Thanks for your help, by the way. I really appreciate it.
I followed the steps on another windows machine I have. I setup the ESXi installation fine, but when I moved back over to the Jetway rig, it doesn’t boot. It gets stuck at “relocating modules” >(.
Perhaps the VM i used to do the setup wasn’t close enough to the target hardware?
Well, is it possible to install Windows on your destination system and use the VMWare Player there?
I’m trying to install esxi from USB pen but on s.v00 file from error loading, compressed MD5: 0000000000000000000, Decompressed MD5: 000000000000000000000, Fatal Error: 10 (out of resource).
La mia scheda è Asrock J4205-ITX.
Could you give me a hand?
Hi Antonio,
I’m trying to setup an esxi server on my new moterboard (Asus n3150 + 4 GB ram) using your IPXE iso.
Everything is going good until it happened the error with the 12th file :
Error loading …/ISO/s.v00
Compressed MD5: 15……b1a
Decompressed md5: 00…..000 (all zeroes)
Fatal error: 10 (out of resources)
I have the same problem using USB o trying to install on internal HDD.
It seems to me I have the correct HW.
Can you help me? Where am I wrong.
Hi Paolo,
4 GB RAM is the absolute minimum for ESXi. It is possible, that the instant ESXi installation occupies some extra RAM (“out of resources”).
So upgrade your RAM or try my other installation methods, e.g. these here:
1. Booting from USB-Stick:
https://mobiletiger.jorba.de/esxi-6-5-kickstart-installation/
2. Using a virtual machine for installation:
https://mobiletiger.jorba.de/vmware-esxi-6-0-n3150-itx-intel-celeron-braswell-platform-problem-solved/
Thank you very much for the answer, Antonio.
I can’t upgrade the ram in short time and so I will try the kikstart installation, today or tomorrow,according your suggestion.
I found that esxi 5.1 needs only 2 GB of ram. Do you think is better that I try to customize this version (or maybe you already have a customized IPXE)?
Paolo
Hi Antonio,
I finally successfully installed esxi (6.5) on my “server”.
First I tried (at lest 5 times with different usb keys and usb ports) the kickstart method but the system doesent reboot and stucks at „relocating modules“.
Then I tried the VmWare player method (I used a different PC from my server with different HW) and it worked at first time.
I also tried to clone the USB over my HDD without success. Now I will try to install the esxi on my HDD with USB adapter.
Thank you.
Hi Paolo,
the message “relocating modules” and after this an obviously “frozen screen” is the normal behaviour on N3150 boards – as I’ve described it here:
1. https://mobiletiger.jorba.de/vmware-esxi-6-0-n3150-itx-intel-celeron-braswell-platform-problem-solved/
This is an issue, because the SoC graphic chip isn’t VGA-compatible and the ESXi installer is switching the video mode after outputting “relocating modules”. The system isn’t really frozen and is running in the background, but there is no more video output on the console and at least you’ll need to enter a root-password and enable SSH to manage the server from remote..
To get this up and running, please read my above article or this here:
2. https://mobiletiger.jorba.de/esxi-6-5-kickstart-installation/
In this 2nd article I use a modified USB stick with kickstart files, which enter root/password and enable SSH and some other parameters automatically in the background, so be patient and wait some time for installation to complete.
And finally, you will NEVER see an ESXi console screen with N3150, but you can get it over ssh (read Article 1). And most important, there is an embedded host client in ESXi server to manage it over http:
Hi Antonio,
I didn’t explain correctly. It was clear to me the problem of “SoC graphic”. I mean that I tried to install esxi with kickstart files but I didn’t succeede becouse the server didn’t reboot (after I waited a whole night). Maybe a problem with the config files (copied from your link) or with uefi boot (I boot in non-uefi mode -> text).
Anyway, yesterday, I installed the esxi 6.5 (using vmware player method) on my HDD (usb adapter) with no problem.
So thank you again for your work and your support.
Paolo
Hi Paolo,
ok, I understand.
The “VMware Player solution was my first approach to solve the problem with ESXi and N3150.
But mostly it is so, the first solution is the best. At least most readers of my blog have been successful. I’m glad your system works as well.
I’ve successfully installed with the netboot method. I installed from a 32GB USB3 stick and that was the only storage connected to the board.
When I reconnect my drives, the system is not booting anymore from the Stick, just a blinking cursor showing. Without the drives connected it was booting fine from the stick.
What can I do apart from trying another install?
If the system is booting from stick when there are no additional drives and than there will be a blinking cursor, when you attach other drives, you have to rearrange the boot sequence in BIOS.
Go to BIOS setup, check that booting from your USB stick is setup to first position and some people have to switch it to “legacy boot mode” (not UEFI). If this is not working, please post your system description – which board, processor, RAM, hard drives, size of stick, …
I get kicked out at
“http://www.jorba.de/esxi/ipxe/ESXi-6.0.0-20160804001/iso/mboot.c32 ………………………………. Connection reset (http://ipxe.org/0f0a6039)”
Welp!
Hi Chris,
… this is an older article, please use this here:
https://mobiletiger.jorba.de/esxi-6-5-kickstart-installation/
It has two advantages.
First of all, you’ll install a newer version (ESXi 6.5) and it is a scripted installation, which can be used automatically or manually without copying my kickstart files to installation USB stick.
I’ll update this internet installation method (instant ESXi installation) from V6.0 to 6.5 when I have holidays 😉
ESXi-6.5.0-20171204001-standard-customized is support j3160?
yes, this image includes the drivers needed by a J3160 system (and N3150)
thanks,N3160 maybe don’t support?
… well, J3160 is the newer generation compared to N3150. Both are Intel Celeron processors, I tested both, but never tested a system with N3160 braswell CPU.
None of these systems are “supported” by VMWare, but should work with the workarounds described here at https://mobiletiger.jorba.de. In sum there are three posts concerning these topics:
1. https://mobiletiger.jorba.de/esxi-6-5-kickstart-installation/
2. https://mobiletiger.jorba.de/vmware-esxi-6-0-n3150-itx-intel-celeron-braswell-platform-problem-solved/
3. https://mobiletiger.jorba.de/install-vmware-esxi-5-5-6-successfully-on-qotom-j1900/
Please find out, which network and SATA interfaces are built into your system and match then to my included drivers. Perhaps you have to build your own installation image.
This is most excellent and saved me a lot of faffing about, much appreciated kind Sir .)
The IPXE USB boot file is not available anymore. Could you please check the download URL?
thank you Robert, the link to the USB boot file has been updated
due to domain rearrangement, I updated some links for file download